Running audits on a file share within file server is a challenging task, especially when you do not have a budget for sophisticated file auditing tools from a third-party vendor. These tools can not only be costly but can lead to tool sprawl.Auditing challenges that IT managers face:
- Difficulty in determining who accessed a file at a specific time.
- No historical data to analyze if a security incident were to happen.
Any organization who has their workloads in Azure should leverage the Microsoft SIEM tool, Azure Sentinel. Azure Sentinel is an easy and cost-effective way to collect, analyze, and act on security events that occur in your IT environment.
In this article, we will walk through creating a simple but effective way to use the audit file server features and stream the audit log to Azure Sentinel.
Prerequisites:
- Windows File server
- Azure Sentinel
Enabling the Windows Server File audit feature
On Windows Server, auditing file and folder access consist of two parts:
- Enable file and folder auditing: Through Group Policy (for Domains, Sites and Organizational Units) or through Local Security Policy (for stand-alone Servers).
- Configure audit settings for file and folders.
Enable Auditing through Group Policy
To enable auditing through GPO, follow these steps:
- Go to “Start” ➔ “Control Panel.” In this window, double-click “Administrative Tools,” and then double-click “Group Policy Management” console to open it.
- Go to the concerned domain and expand it as shown in the following figure.
- Right-click “Group Policy Objects” and click
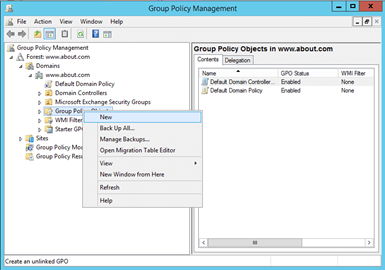
Figure 1: Go to domain and expand the node. Select New from the context menu
4. In “New GPO” dialog box, enter the name of new GPO and click “OK.”
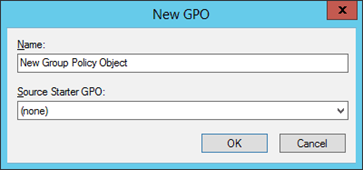
Figure 2: Enter new GPO’s name.
5. Right-click the newly created GPO and click “Edit” to open “Group Policy Management Editor” window.
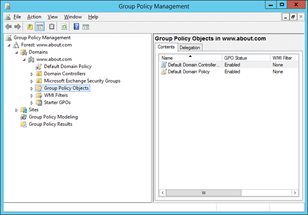
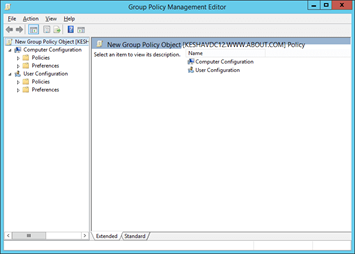
Figure 3&4: GPO management editor
6. In “Group Policy Management Editor,” go to “Computer Configuration” ➔ “Policies” ➔ “Windows Settings” ➔ “Local Policies.”
7. Select “Audit Policies” to view all policies in the right panel.
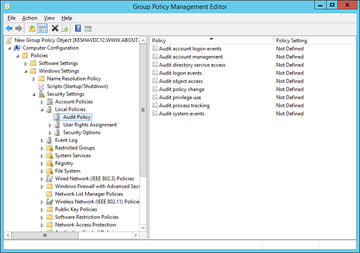
Figure 5: Audit policies
8. Double-click “Audit Object Access” to access its properties.
9. Click “Define these Policy Settings” to check its box.
10. Check both “Success” and “Failure” boxes.
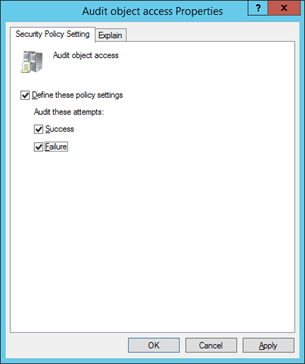
Figure 6: Configure Audit object access.
11. Click “Apply” and “OK.”
12. Open “Command Prompt” and execute the following command to apply this policy on the file server:
gpupdate /force
After the policy has been applied, you can configure audit settings for files and folders.
Enable Auditing of a Specific Folder
To select specific folders and define users, follow these steps.
- Select the folder that you want to audit.
- Right-click and click “Properties” to access its properties.
- Go to the “Security” tab and click “Advanced.”
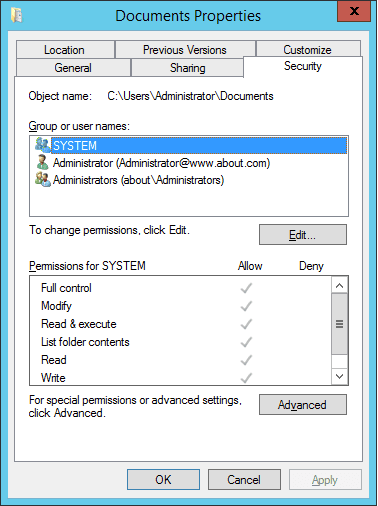
Figure 7: Properties of a folder
Stream windows server security log to Azure Sentinel.
4. In the “Advanced Security Settings…” dialog box, select the “Auditing” tab

Figure 8: Click the Auditing tab
5. Click “Add” and the “Auditing Entry for…” window will appear.

Figure 9: Auditing Entry for Documents dialog box
6. Click the “Select a principal” link and it will show the “Select User…” dialog box.
7. Type the name of the user, of whose access you want to monitor. Click “Check Names” button to validate its entry. You can repeat this step to provide the names of all users whose access to the selected folder will be monitored. Alternatively, you can type “Everyone” to monitor every user’s access to this folder.
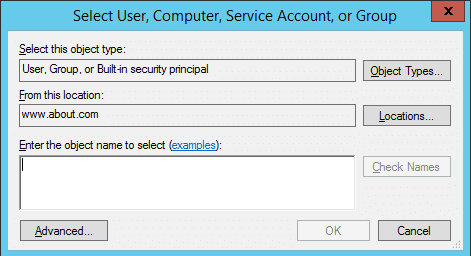
Figure 10: Select User for auditing
8. Click “OK” once you have made your selection of users and it will take you back to the “Auditing Entry…” window.
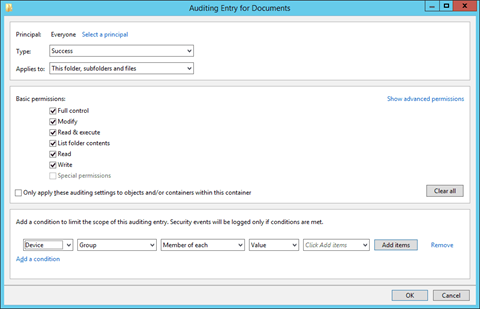
Figure 11: Auditing Entry for Documents settings
9. Select “Both” in “Type” drop-down menu to monitor both “Success” and “Fail” accesses made to the folder.
10. In the “Applies to” drop-down menu, select “This folder, subfolders, and files.”
11. Select “Full Control” or the appropriate permissions for auditing. It is advised to click “Show Advanced Permissions” and select all permissions.
12. You can use the “Add a condition” link at the bottom to limit the scope of this auditing entry. You can add multiple conditions, if required. This way the auditing will generate limited logs.
13. Click “OK” to save the settings and close the “Auditing Entry for …” window.
14. Click “Apply” and “OK” to close the “Advanced Security Settings for” window.
15. Click “OK” to close the folder properties.
Stream Windows security log to Azure Sentinel
There are 2 main parts for this setup:
- Configure the Data connector
- Create a custom Workbook
Configure the Data connector:
Open Azure Sentinel and go to the “Data connectors” blade under “Configuration.” Type “Security Events” in the search box and select “Security Events,” then click the “Open connector page”.
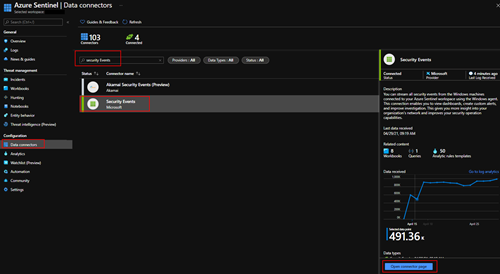
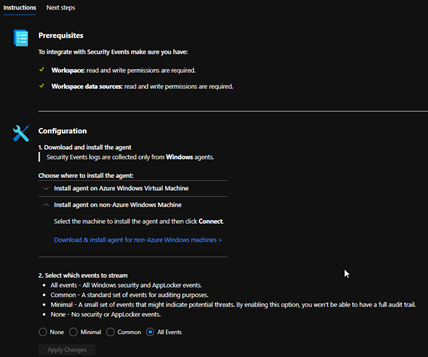
Follow steps 1 and 2 in the “Configuration” steps for setup of the security event connector.
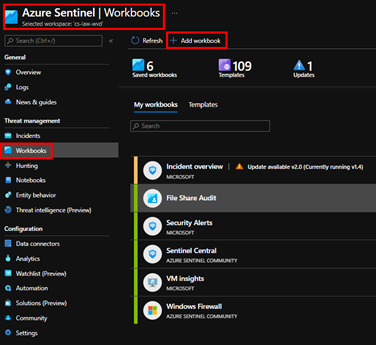
Create a custom Sentinel Workbook
Under the Azure Sentinel blade, choose “Workbooks” then click on “Add workbook.”
In the New workbook, click “Edit.” Remove the sample analytics query by clicking on the “…” and choosing “Remove”. Click “Yes” to confirm the removal.
Once all sample analytic queries are removed, click “+ Add,” then “Add query” to add a Log Analytics query.
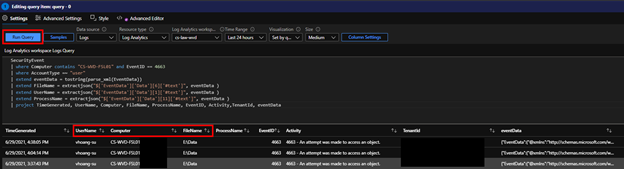
Copy and paste this query below to query the necessary info for your file audit. Replace “File Server Name” with the name of your file server.
SecurityEvent
| where Computer contains <“File Server Name”> and EventID == 4663
| where AccountType =~ “user”
| extend eventData = tostring(parse_xml(EventData))
| extend FileName = extractjson(“$[‘EventData’][‘Data’][6][‘#text’]”, eventData )
| extend UserName = extractjson(“$[‘EventData’][‘Data’][1][‘#text’]”, eventData )
| extend ProcessName = extractjson(“$[‘EventData’][‘Data’][11][‘#text’]”, eventData )
| project TimeGenerated, UserName, Computer, FileName, ProcessName, EventID, Activity,TenantId, eventData
Click “Run Query” and confirm that you received all the information needed.
Click “Done Editing” when done and Click “Save” or “Save as” and give it a new name.
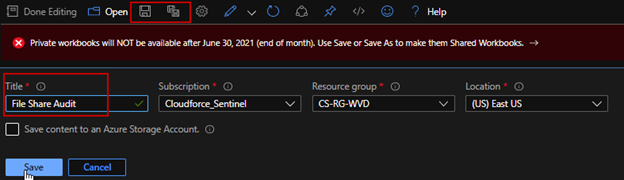
Note: Private workbooks are deprecated by June 30, 2021. You can follow this KB to convert them to a shared workbook to continue using them.
We are done.
Now you can go to your “File Share Audit” workbook under My workbooks and look for the file audit there.
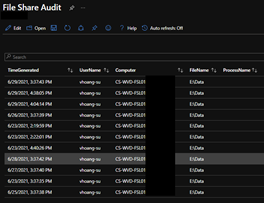
Happy Auditing!
 by
by